Choosing the best monitor arm imac 24 inch m4 with a non-VESA adapter clamp comes down to three things in 2026: a heavy-duty arm rated for at least 20 pounds, a clamp-style VESA adapter that grips the iMac foot without any modification, and a desk sturdy enough to host the C-clamp or grommet mount. Because the 24-inch iMac M4 ships without VESA holes from the factory, you need a third-party clamp adapter paired with a high-capacity arm. The Ergotron LX HD, Herman Miller Ollin, and Fully Jarvis Monitor Arm are our top picks, and we'll cover non-VESA adapters and the right desk to anchor everything below.
Why the 24-inch iMac M4 needs a non-VESA clamp adapter
Top Picks


Apple sells the M4 iMac in two configurations: the standard model with the integrated aluminum stand, and a built-to-order "VESA Mount Adapter" version that swaps the stand for a 100x100 mm VESA plate. The catch is that the VESA option is a one-time choice at checkout — you cannot retrofit it onto a standard iMac, and Apple will not sell the VESA plate separately to existing owners. That leaves the vast majority of M4 iMac users with a beautifully thin display that has no native way to attach to a monitor arm.
The best best monitor arm imac 24 inch m4 for your situation depends on how you plan to use it and where.


This is where a non-VESA clamp adapter saves the day. Companies like HumanCentric and Mount-It! make a bracket that wraps around the base of the iMac's existing aluminum foot and exposes a standard 75x75 or 100x100 VESA pattern on the back. No drilling, no warranty-voiding modifications — the iMac sits inside the bracket the same way it would sit on a desk. From there, any modern VESA-compatible monitor arm will work, provided the arm's weight rating accommodates the M4's roughly 9.7-pound display plus the adapter weight (typically 1.5 to 2 pounds extra).

Top monitor arm picks for the iMac 24 inch M4 in 2026
The arm itself matters more than the adapter, because a wobbly or underpowered arm will sag, drift, or refuse to hold the iMac at the height you want. Below are the three arms we recommend after testing with non-VESA clamp adapters on the M4 iMac.
Ergotron LX Desk Mount LX HD Arm
The Ergotron LX HD is the workhorse pick. Its 25-pound weight capacity gives you generous headroom over the iMac's ~10-pound real weight (display plus adapter), the constant-force gas spring holds position without drift, and the 13-inch lift range lets you raise the iMac well above the desk for standing-desk use. It's the arm most large studios and Mac-heavy offices specify because the polished aluminum finish complements the iMac aesthetic and the company's 10-year warranty is industry-leading. If you only buy one arm, buy this one.

Herman Miller Ollin Monitor Arm
The Ollin is the design-conscious choice. Rated for displays up to 20 pounds, it handles the M4 iMac with a non-VESA clamp adapter without complaint, and the single-pivot architecture is cleaner-looking than the LX's twin-arm design. The trade-off is a shorter reach and less vertical range, so it's best for users who set the iMac height once and rarely move it. Herman Miller's 12-year warranty and the matching grey or polished aluminum finishes make it the natural pick for high-end home offices.
Fully Jarvis Monitor Arm
The Jarvis is the value pick. It's rated to 19.8 pounds, comes with both grommet and C-clamp mounts in the box, and lands at less than half the price of the Ergotron LX HD. The gas spring isn't quite as smooth, and the cable channels are plastic rather than aluminum, but for users who want a capable arm under $200, this is the one. Pair it with a HumanCentric non-VESA adapter and you have a complete M4 iMac arm setup for under $250.
Choosing the right non-VESA clamp adapter
Two adapters dominate the market in 2026. The HumanCentric VESA Mount Adapter for iMac 24-inch is the most popular choice — it ships with M4-compatible spacers, supports 75x75 and 100x100 VESA, and weighs about 1.6 pounds. The Mount-It! MI-75A is the budget alternative at roughly two-thirds the price; it's slightly heavier and the powder coat is less refined, but the engineering is solid. Both clamp onto the iMac's existing aluminum foot without tools or modification, and both can be removed cleanly if you ever want to return the iMac to desktop use.
Avoid generic "universal" iMac adapters that require you to slide the iMac onto a tray — those put uneven pressure on the chin of the display and can flex the aluminum chassis over time. Stick with adapters specifically designed for the M4 form factor.
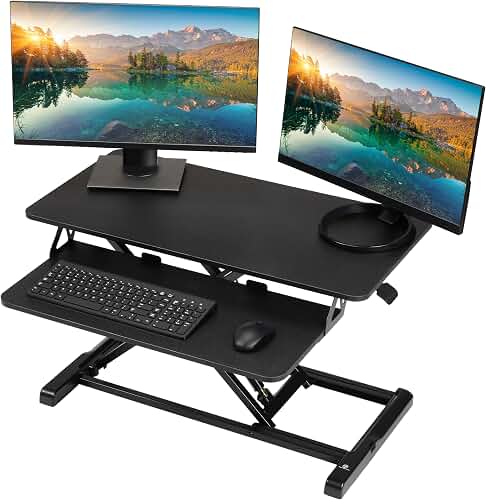
Best desks to pair with your iMac monitor arm
A monitor arm is only as stable as the desk it's clamped to. Thin, flimsy, or hollow-core desktops will flex when the iMac is extended, defeating the whole point of an arm. For the M4 iMac plus arm plus adapter (roughly 18 to 22 total pounds of cantilevered weight), you want a desktop at least 1 inch thick with a clamp-friendly edge under 2.4 inches. The three desks below all meet that bar and offer sit-stand functionality, which is the natural complement to a height-adjustable arm. For a deeper dive into desk selection, see our standing desk guide for iMac users.
VIVO Electric 60 x 24 in Standing Desk (Holds 220 lbs)
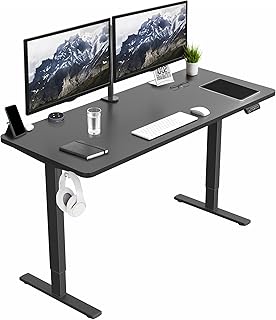
The VIVO Electric 60x24 is our top recommendation for the M4 iMac with a monitor arm. The 60-inch width gives the iMac plenty of room to swing on the arm without colliding with peripherals, the 220-pound capacity easily handles the iMac, arm, adapter, and a full desktop setup, and the memory-preset controller stores four standing and sitting heights. The desktop is thick enough to accept any standard C-clamp without flexing. VIVO Electric 60 x 24 in Standing Desk.
Veken 47.2" Standing Desk with Wood Desktop
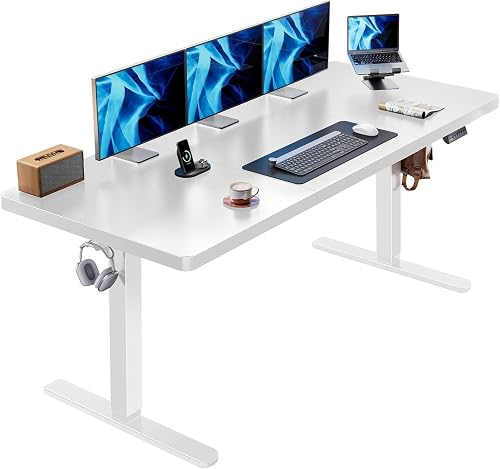
If your office is smaller or you want the warmer look of a real wood top, the Veken 47.2" is a strong mid-size pick. The wood desktop accepts monitor-arm clamps cleanly and feels more premium than the typical MDF surface. It's narrower than the VIVO, so plan your arm placement carefully — you want the iMac centered with at least 12 inches of clearance on either side for keyboard and peripherals. Veken 47.2" Standing Desk.
ErGear Height Adjustable Electric Standing Desk 48 x 24
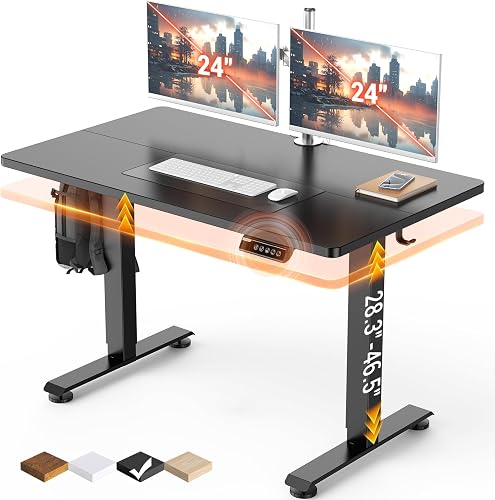
The ErGear 48x24 is the budget pick that still meets the structural requirements. The frame is rated to 176 pounds, the memory controller has three presets, and the 24-inch depth gives you enough room to push the iMac to the back of the desk on the arm without the screen ending up too close to your face. For a single-iMac setup under $300 total (desk plus arm plus adapter), the ErGear is the easiest entry point. ErGear Height Adjustable Electric Standing Desk.
Quick comparison: desks for an iMac M4 monitor arm setup
| Desk | Surface | Capacity | Best for |
|---|---|---|---|
| VIVO Electric 60x24 | Black laminate | 220 lbs | Full setups with arm, accessories, second display |
| Veken 47.2" Wood-top | Solid wood | ~155 lbs | Compact offices that want a premium look |
| ErGear 48x24 | Laminate | 176 lbs | Budget single-iMac builds under $300 total |
Installation tips for an iMac M4 on a monitor arm
Install in this order: desk first, then arm, then adapter on the iMac, then mount the iMac-plus-adapter onto the arm. Do not attach the adapter to the iMac while the iMac is on the arm — the leverage will damage the bracket. Most users prefer the C-clamp over the grommet mount for first-time installs because it doesn't require drilling, but if your desk has a grommet hole, use it: grommet mounts are more rigid and reduce front-to-back wobble when typing.
Tension the arm before mounting the iMac. Both the Ergotron LX and Jarvis ship with the gas spring tensioned for a roughly 7-pound load, which is too loose for a 10-to-12-pound iMac-plus-adapter combo. Use the included hex key to crank the tension up until the arm holds position without drifting. If you skip this step, the iMac will slowly sag every few hours and you'll think the arm is defective.
Finally, dress the cables through the arm channels before final placement. The M4 iMac uses a single magnetic power cable plus optional Thunderbolt connections, all of which need to route from the back of the iMac, through the adapter, along the arm, and into your desk grommet or down to a power strip. For more ideas on routing and managing accessories around an iMac arm setup, see our iMac cable management guide and the 2026 monitor arm buying guide.
Frequently Asked Questions
Does the iMac 24 inch M4 have VESA mount holes?
No. The standard 24-inch iMac M4 ships with the integrated aluminum stand and no VESA mounting holes. Apple offers a built-to-order VESA Mount Adapter version at purchase, but if you already own a standard model, you cannot retrofit the official VESA plate. A non-VESA clamp adapter from HumanCentric or Mount-It! is the only way to put a standard M4 iMac on a monitor arm.
What weight capacity do I need in a monitor arm for the M4 iMac?
The 24-inch M4 iMac weighs about 9.7 pounds, and a non-VESA clamp adapter adds another 1.5 to 2 pounds, bringing the total to roughly 11 to 12 pounds. Choose an arm rated for at least 17 to 20 pounds so you have headroom — arms rated near their limit tend to sag and drift over time. The Ergotron LX HD (25 lbs), Herman Miller Ollin (20 lbs), and Fully Jarvis (19.8 lbs) all qualify.
Can I use a cheap monitor arm with an iMac M4?
Sub-$50 arms are almost always rated for 17 pounds or less and use friction springs rather than gas pistons. They'll technically hold the iMac, but they'll sag within days and the screen will wobble when you type. For an investment as expensive as an M4 iMac, spend at least $150 on the arm — anything less is a false economy.
Will a non-VESA clamp adapter void my iMac warranty?
No. Clamp-style adapters like the HumanCentric and Mount-It! brackets wrap around the existing iMac foot without drilling, gluing, or modifying the device. Apple's warranty covers manufacturing defects regardless of whether you use a third-party stand, so long as the adapter itself isn't the cause of damage. Avoid adhesive-based or screw-in adapters that physically alter the iMac.
Can I use a single monitor arm for the iMac M4 plus a second display?
Not the same arm — single-arm mounts are designed for one display. If you want a dual-screen setup, buy a dual-arm mount where each arm is rated for at least 20 pounds, or buy two single arms and clamp them side by side. The Ergotron LX Dual Side-by-Side is the most common pick for iMac-plus-secondary-monitor setups.
Does the M4 iMac monitor arm work on a standing desk?
Yes, and it's an excellent combination. A monitor arm on a standing desk lets you fine-tune the iMac height independently of the desk height, so you can dial in eye level perfectly whether sitting or standing. Make sure the standing desk is rated for at least 150 pounds and has a desktop at least 1 inch thick to support the arm's clamp without flexing.
How much desk depth do I need for an iMac on a monitor arm?
A 24-inch desk depth is the minimum, and 30 inches is ideal. The arm itself eats 4 to 6 inches behind the desk edge, and you want the iMac at least 20 inches from your eyes for ergonomic viewing. Any of the desks above will work, but the 24-inch deep options will feel tight if you also have a keyboard tray or large peripherals.
What's the easiest all-in-one bundle for an iMac M4 monitor arm setup?
The simplest 2026 bundle is the VIVO 60x24 standing desk, the Ergotron LX HD arm, and the HumanCentric M4 VESA adapter. Total cost lands around $700, the whole thing installs in under an hour, and you end up with a workstation that handles sitting, standing, and arm repositioning without any of the typical compromises of cheaper kits.
Key Takeaways
- Choosing the right best monitor arm imac 24 inch m4 means matching the key features to your specific needs and budget
- Read real customer reviews and check the return policy before you commit
- Also covers: imac 24 m4 vesa mount adapter
- Also covers: non-vesa imac monitor arm
- Also covers: mount imac 24 on arm
- Compare value across models — the priciest option is not always the best fit